
As a teacher or homeschooler, you know the importance of teaching your student about geometry. But did you know that an engaging way to do so lies right at home? With Montessori Sensorial Geometric Cabinet, you can give your students a hands-on experience and create an unforgettable lesson!
This educational tool is great for reinforcing the basics of shapes and space while allowing children to explore in a fun and creative way. Learn more about how this Montessori material can benefit your enrichment program!
The Geometric Cabinet is within the Visual Sense of Sensorial. It is the last section of lessons for Sensorial, preparing children for math.
What is a Geometric Cabinet?
A geometric cabinet is a Montessori educational tool designed to help children learn the basics of geometry. The wooden cabinet has six wooden drawers containing six shapes.
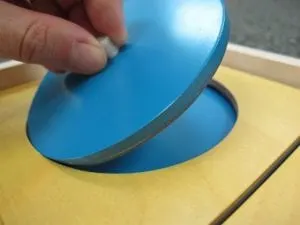
Each drawer has six square templates with a geometric plane figure inset. The insets are dark blue in wooden templates. Each inset has a knob in the center to lift the inset out from the template. Children can learn to classify triangles, circles, rectangles, and squares into their respective categories through tactile materials.
Geometric cabinets also provide an opportunity for children to explore spatial relationships between shapes, enabling them to develop an understanding of abstract thinking. Furthermore, Montessori teachers often use geometric cabinet activities with other materials for further learning opportunities.

Learn more about Montessori Sensorial in this elf-paced eCourse
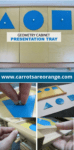
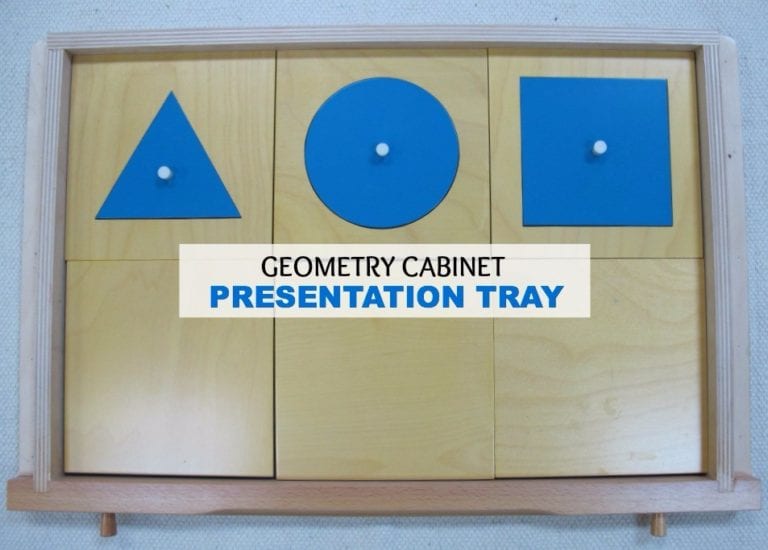
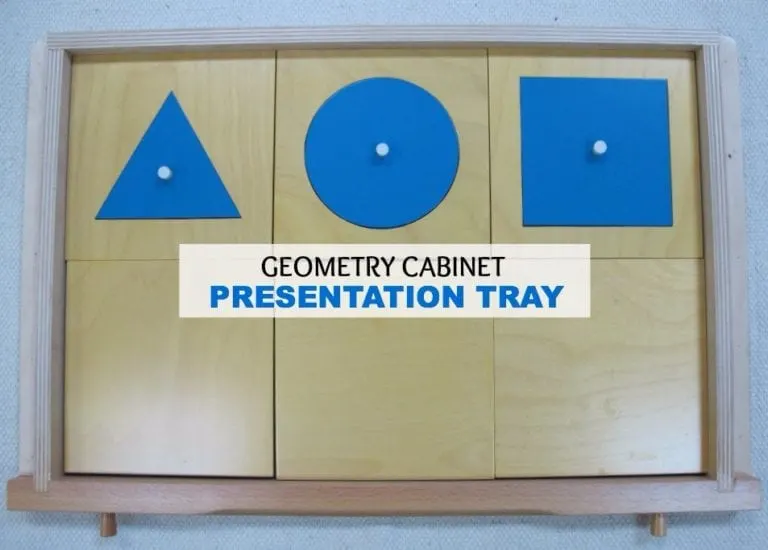
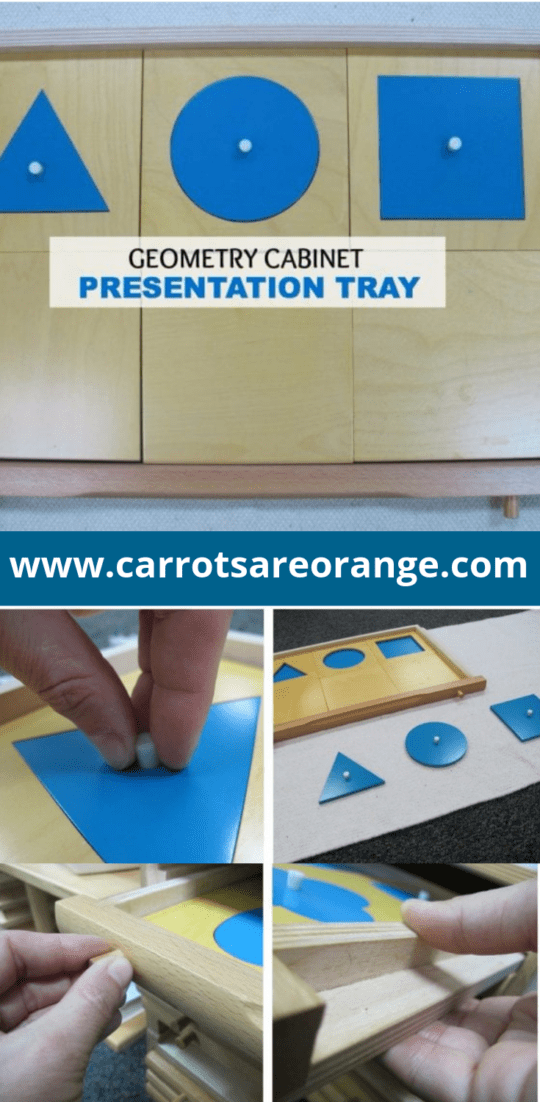
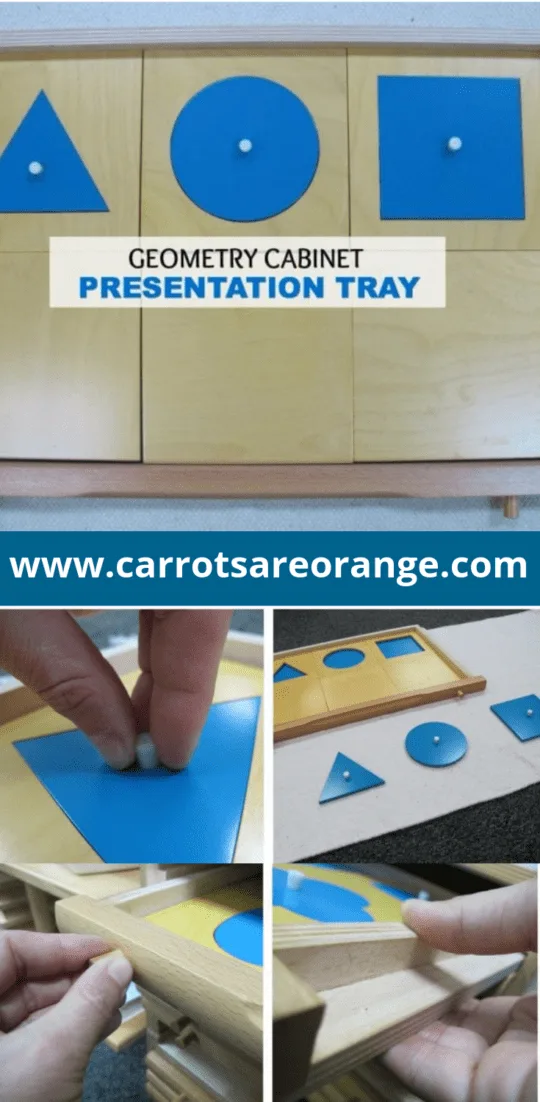
Geometric Cabinet – Presentation Tray
The first tray presented in the lesson is the “presentation tray”.
Age:
2.5 to 5.5 years
Materials:
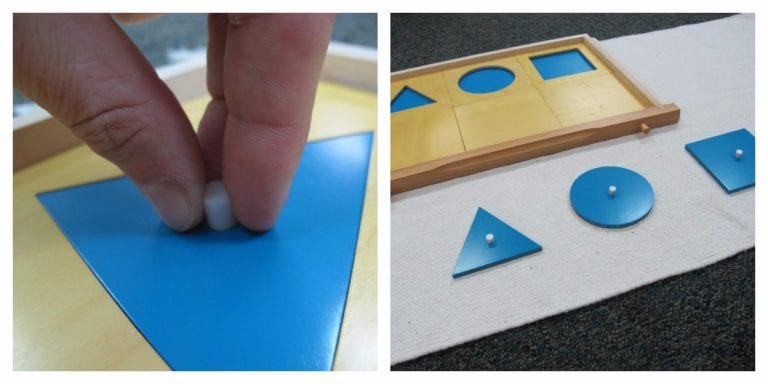
A wooden tray section into 6 wood squares. Three squares contain wooden insets, one triangle, one circle, and one square.
Prerequisites:
Previous sensorial materials


Presentation I:
- Invite the child to work. Say to the child: “This is the presentation tray of the geometry cabinet.”
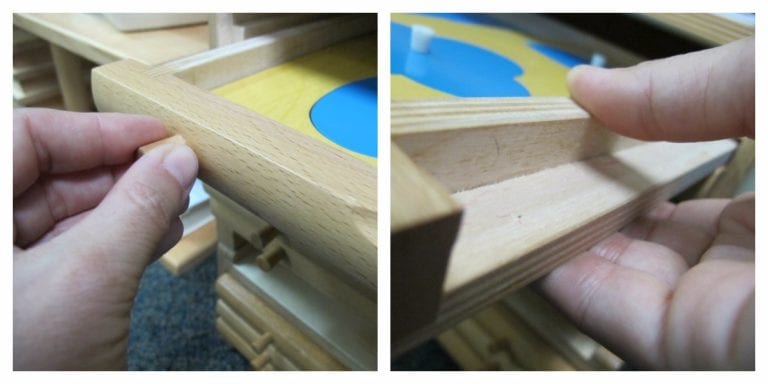
- Show the child how to grasp the knobs with a 3-finger grip to slowly and only slightly move the drawer from the cabinet
- Show the child how to inch the tray out with hands on either side until halfway open, then how to grasp the drawer in the middle, thumbs on top and fingers underneath
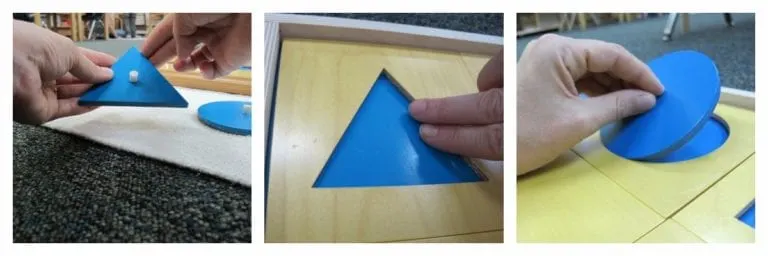
- After gently placing tray on the rug, use 3-finger grip of the dominant hand to grasp the knob of each shape and move them below the drawer.
- Pick up triangle inset with sub-dominant hand and, with the painted side facing child and you, trace the triangle inset with index and middle fingers of the dominant hand.
- Trace the template and then say: “This is a triangle, would you like to trace the triangle? Can you say triangle?”
- Replace the triangle to its blank space and complete the three-period lesson: “Please show me the triangle.”
- Ask the child to put the insets back into their respective templates. Demonstrate how to properly replace the inset by slowly bringing the edge closest to you and child entering the template first: “Can you put away the circle? Can you put away the square? Can you put away the triangle?”
- Carry the drawer back to the geometry cabinet. Show the child how to catch the drawer on its track and then slide the drawer into place.

Control of Error:
- The inset doesn’t fit
- Placing the shapes into the templates correctly without sound or damage
- Teacher

Points of Interest:
- Tracing the inset
- Putting the insets back into the templates
- Practice with 3 finger grip
- The textures and qualities of the shape
- Placing the insets back into the template corner first and gently
- Opening the lid of the tray
- Removing the drawer from the cabinet and seeing what is inside the drawer
Aims:
- Introduction to Geometry
- Preparation for writing
- Preparation for metal insets
- Knowledge and ability to identify shapes within the environment
Language:
triangle, square, circle, template, inset, geometry cabinet, tray, drawer, knob
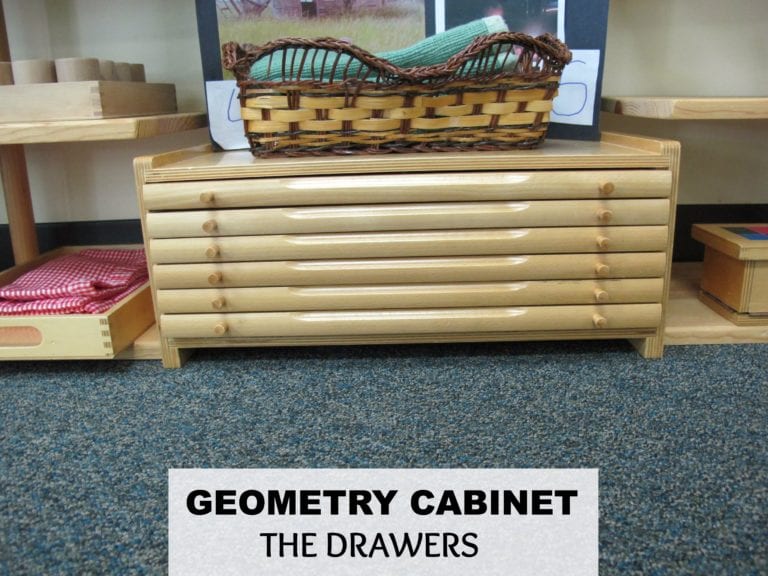

Geometric Cabinet – The Drawers
Age:
2.5 to 6 years old
What are the six drawers in the geometry cabinet?
Wooden cabinet with 6 drawers. Each drawer has six squares. Each square has an inset of a geometric plane figure. The insets are dark blue in wooden templates. Each inset has a knob in the center to lift the inset out from the template.
Drawer 1 – Six circles decreasing in diameter from 10 – 5 cm. Inset 1 (top left-hand corner) is the largest circle. Inset 6 (bottom right-hand corner) is the smallest circle.
Drawer 2 – Six rectangles, one of which is a square. All rectangles have the same base but vary in height. Inset 1 (top left-hand corner) is the largest rectangle. Inset 6 (bottom right-hand corner) is the smallest rectangle.
Drawer 3 – Six triangles of various angles or lengths of their sides. From 1 to 6 going clockwise from top left-hand corner to the bottom right-hand corner, included in this drawer is isosceles right triangle, acute isosceles triangle, obtuse isosceles triangle, isosceles right triangle.
Drawer 4 – Contains six polygons that have a flat side for a base. From 1 to 6 going clockwise from top left, this drawer includes pentagon, hexagon, heptagon, octagon, nonagon, and decagon.
Drawer 5 – Contain four quadrilaterals, including a rhombus, a blank one, a trapezium, a parallelogram, a blank one, and a right-angle trapezium.
Drawer 6 – Contains six irregular figures, including an oval, a blank space, a curvilinear triangle, an ellipse, an equilateral triangle, and a quatrefoil.
Prerequisites: Presentation Tray
Aims:
- Names of plane geometry shapes
- Visual discrimination of size & shape
- Concentration
- One to One Correspondence
- Hand-eye coordination
- Preparation for writing & math
Geometric Cabinet with Cards
Age: 4 to 7 years old
Materials:
A geometry cabinet, a set of cards with the shapes of the geometry cabinet drawn and colored in; another set of cards with the outlines of the shapes heavily outlined; a third set of cards with the shapes thinly outlined. The progression of the introduction is the filled-in cards, the thick outline cards, and the thin outline cards.
Prerequisites:
Basic practical life exercises using the 3 finger grip
Presentation:
The presentation for the circle drawer will be described. The other drawers are presented in order, in exactly the same way. Remove all solid, thick, and thin circle cards from their box to prepare for this presentation.
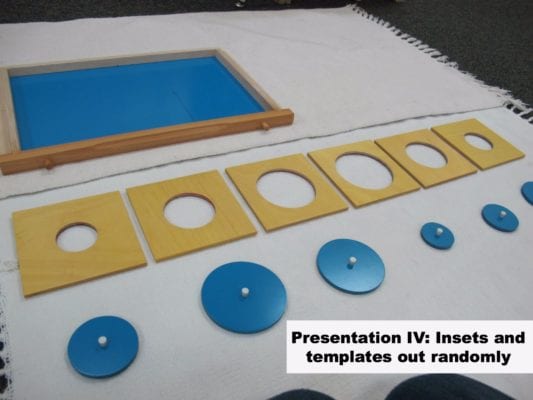
- Invite the child to see some new work with the geometry cabinet. Have the child bring the circle drawer, and you carry the cards. Ask the child to remove the insets and form a straight horizontal line. Then remove the templates and put them above the insets.
- “These are the geometry cabinet cards for the circle drawer.” Lay the solid circle cards out randomly below the insets.
- Invite the child to put the cards in order. Pick up circle one and put it on its card. Continue with the remaining insets.
- “Can you see any blue on the card? Would you like to check the rest of them?”
- When all cards are checked, have the child put the insets back into the templates in order, then put the templates back into the drawer in order, and finally the circles back into the templates OR Ask the child if he would like to see another set of cards.
- Hand the child a set of thick-lined cards and ask her to put them in order. Check the order by placing the circle on its thick outline card.
- Do the first few and then ask the child to complete.
- The circles can be returned to the templates at this point, the templates to the drawer and the insets to the templates

OR the work can move ahead as follows:
- Randomize both sets of cards and let the child put them back in order
- Then, randomize both sets of cards and the insets and let the child put them back in order
- Finally, randomize both sets of cards, insets, and templates and let the child put them back in order
- Show the child how to match templates to the cards
- Give the child a set of thin line cards to sort; when all three sets of cards are in order, check each all the way through with the corresponding inset and leave the inset on the thin line cards which form the bottom row
Control of Error:
- No blue or red showing around insets when placed on top.
- The last card doesn’t match.
Points of Interest:
- The layout of cards
- Inset fits on top of each of the three kinds of cards.
- No colors showing around the edges of the insets.
- Fitting templates over the solid cards.
Aims:
- Visual discrimination of shape.
- Small muscle and eye/hand coordination.
- Develop increasingly abstract concepts of plane figures.
- One-to-one relationships.
Language:
Name of shape, thin outline, thick outline, filled-in.
Related Resource: Check out this AMAZING Preschool Math Bundle!
Related Montessori Sensorial Lessons:
- Learn the Montessori Sensorial Binomial Cube Lesson
- Montessori's Trinomial Cube Introduces Preschoolers to Math
- Montessori Lesson: Learn about Golden Beads
- How to Present Montessori's Knobbed Cylinders Lesson
- Montessori Math Number Rod Addition
- 80 + Easy & Engaging Every Day Montessori Math Extensions
- How Montessori Teaches Math – Ten Board Lesson
- How to Use the Montessori Small Bead Frame for Math
- 50+ Montessori Math Resources & Recommendations
- Learn Montessori's Snake Math Game
Looking for extensions? Check out this post on sensorial variations & extensions!
Marnie