I earn commissions from my affiliated links. Please see my disclosure policy for more details.
Montessori’s Trinomial Cube prepares a child as young as 3 or 4 years old for advanced mathematical concepts. Teaching children math early is not only possible but can be fun and natural.
Montessori’s Trinomial Cube
There are 27 pieces that fit together to form a cube 9cm in all dimensions.
“I would like to show you how to use the trinomial cube, would you like to see it?”
“Can you say trinomial cube?” Go to the sensorial area and identify the exercise.


Place box at left center of the work area.
Remove lid pausing to note to/with the child that the lid matches the cube.
Place lid on the table, with its upper left corner, just touching the lower right corner of the box (with hinges toward you).

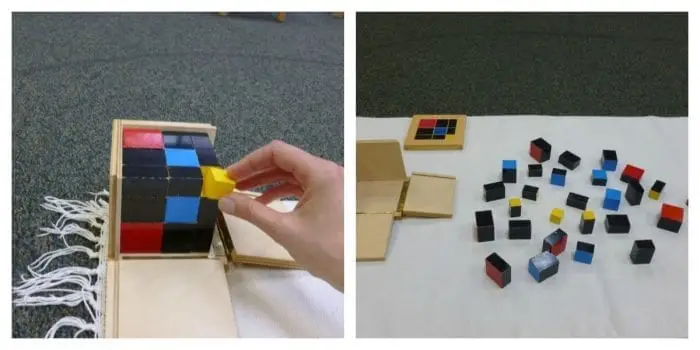
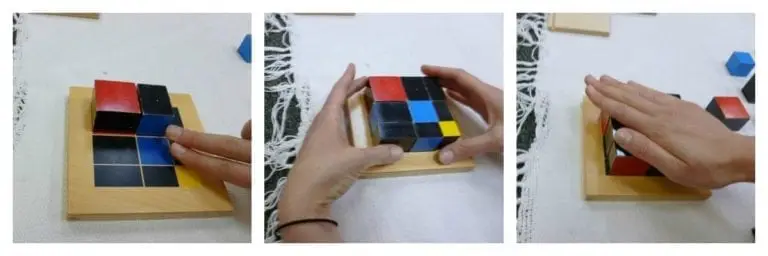
One by one, remove pieces from the box with dominant hand 3-finger grip.
Complete one layer before going to the next layer.
Arrange randomly on the work mat.

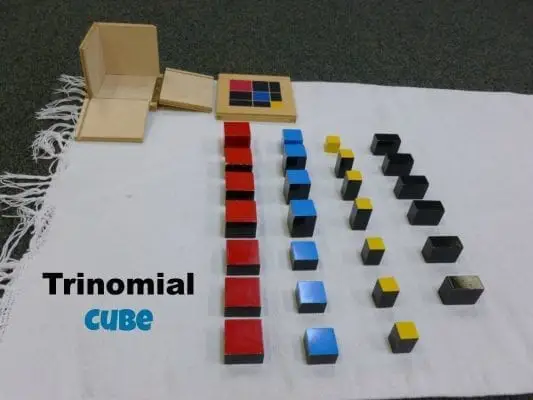
“Let’s put all the red ones together.” Place red cube to the right of the lid and form a vertical line below it with the other red prisms.
Once all the red prisms are in line: “Now we’re going to arrange them by size, largest to smallest.” Leave space between the prisms so that the color of each may be clearly seen by the child.
Line up the blue and yellow prisms in the same way.
Line up the black prisms in the same way except: “Do we need to arrange these by size? No, they are all the same.”

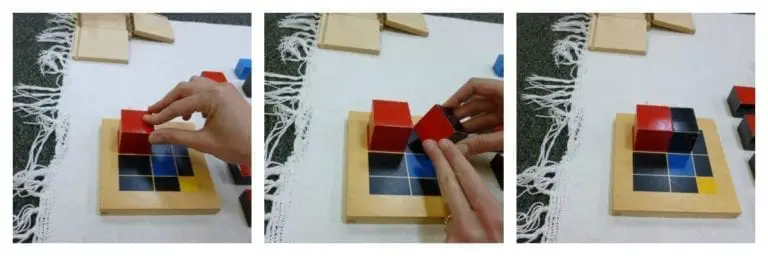
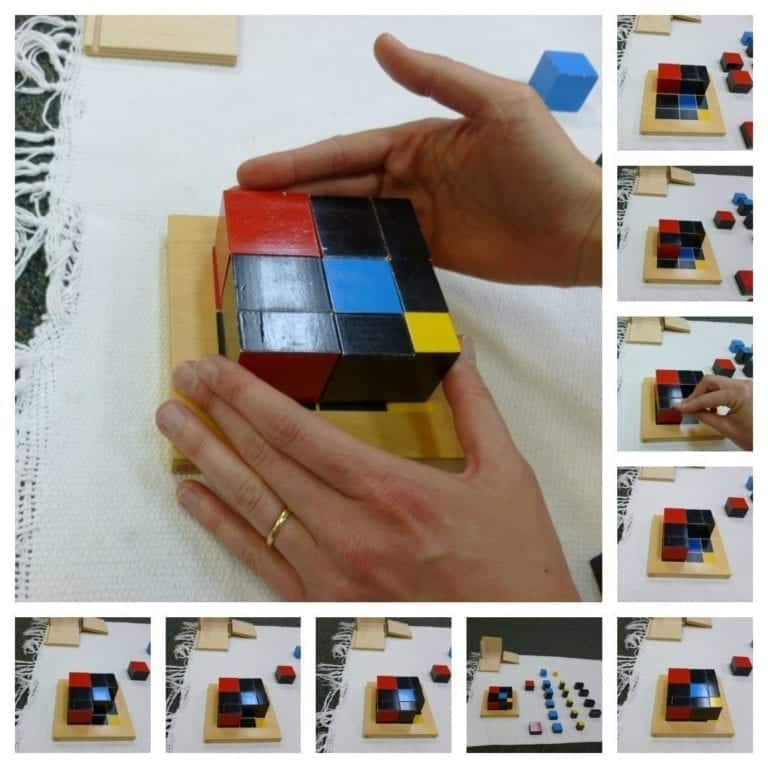
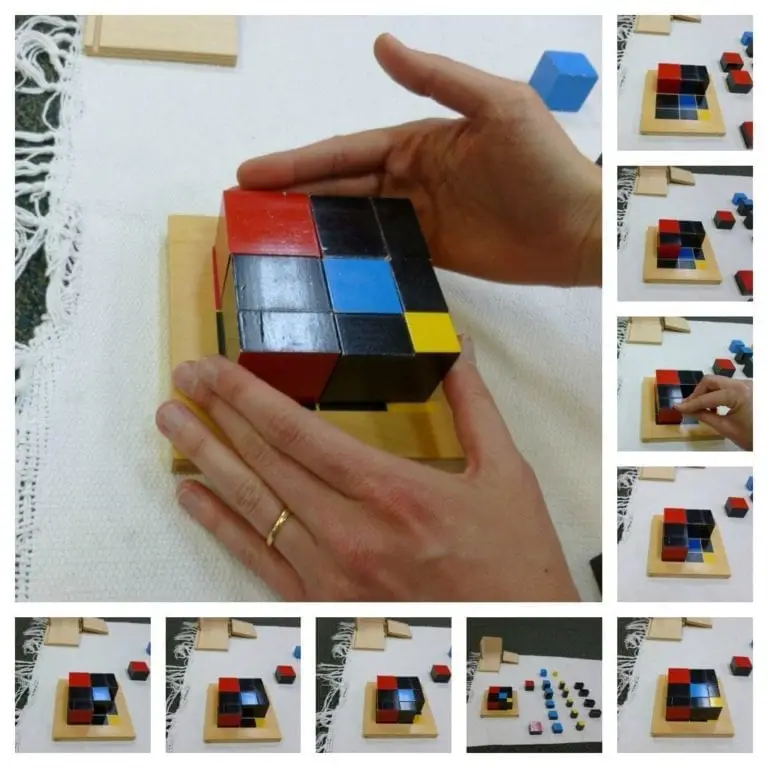
“We begin building this just like we did the binomial cube. Which piece do we need first? Yes, the red cube.”
“Now, what do we need here? What matches this?” (point to the right side of the cube) “and this?”
Child can help select the prism. Touch the base and side and corresponding areas on the cube to emphasize the matching.
Put the prism in place.

Move to the right of the prism just placed, touch its right side and the rectangle on the lid to its right and find the matching prism.
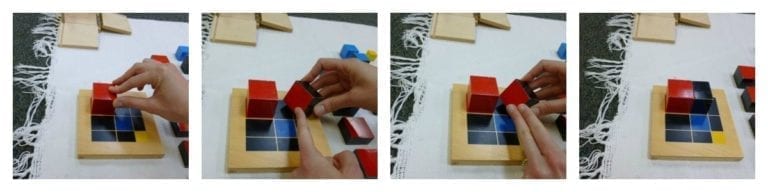
Do this step for all remaining prisms to complete the first layer.
When the first row is complete, use hands to line up the prisms on the lid.
Complete the second and third rows in a similar manner.

Critical points to remember about the Trinomial Cube lesson
Pause, and then touch the right side of prism just placed and the rectangle on the lid to its right to point out the match.
Line up the prisms, and then place your palm over the top of the layer. Always realign once a layer is completed.
Transfer the layer to the box in the order in which the prisms were placed on the lid, starting with the red cube.
Start the next layer with the largest red prism remaining on the work mat and build the layer in the same manner.
Build final layer beginning with red prism, realign, check, and transfer to box.

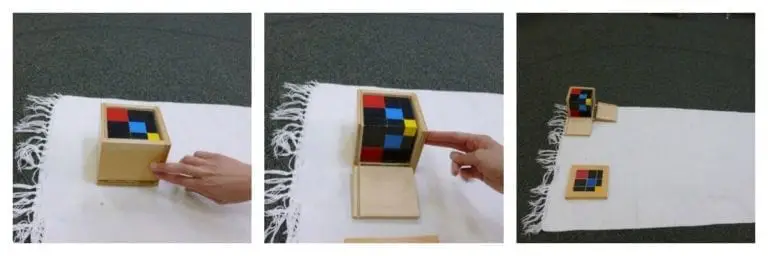
Using the same technique as was used with the binomial cube, close the sides.

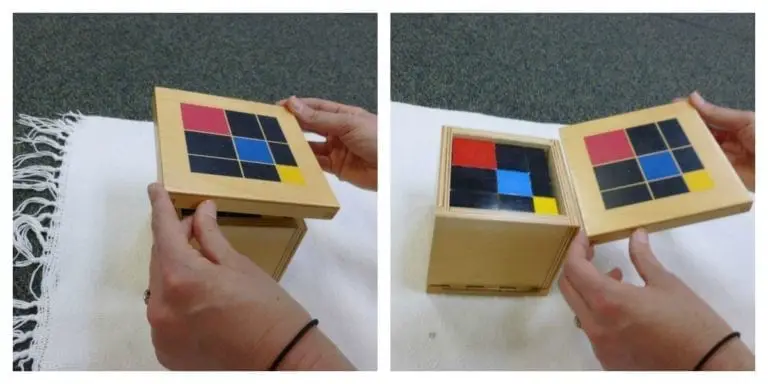
Then replace the lid pointing out in each case the pattern of the cube inside. Offer the child a turn. When finished, show the child how to return the work to the shelf.

Download on Teachers Pay Teachers
Download on Montessori Printables Shop
Related Montessori Math Lessons:
- Learn the Montessori Sensorial Binomial Cube Lesson
- Montessori's Trinomial Cube Introduces Preschoolers to Math
- Montessori Lesson: Learn about Golden Beads
- Montessori Math Number Rod Addition
- 80 + Easy & Engaging Every Day Montessori Math Extensions
- How Montessori Teaches Math – Ten Board Lesson
- How to Use the Montessori Small Bead Frame for Math
- 50+ Montessori Math Resources & Recommendations
- Learn Montessori's Snake Math Game
Marnie