One of the early practical life exercises in a Montessori classroom, Pouring Dry Goods is typically introduced after or simultaneously with Transferring of Dry Goods and Introduction to Sponging.
So, very young children in the classroom are primed for this work. Don't be surprised, though, when the older children continue to return to these activities, perfecting the work as they practice.
For those at home, this activity is excellent for preparing while you get some work done around the kitchen. I keep Practical Life materials in our pantry in the kitchen to make for easy access. Montessori Services also offers an easy and inexpensive Montessori Pouring Dry Goods Set to get you started in your classroom or home.
The Pouring Dry Goods Lesson
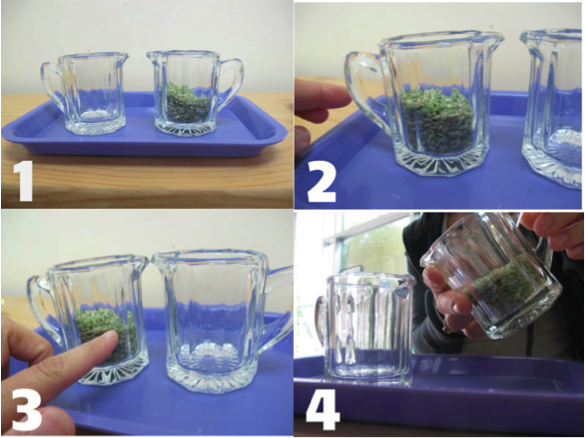
- After showing the child the work location, carry the tray to the work area.
- Place the tray in the visual field of the child.
- Name the objects on the tray and the parts. “This is a pitcher. This is a pitcher. This is the spout. This is the handle.”
- “This pitcher is empty. This pitcher has objects in it.”
- Pour objects slowly from left to right using the proper grip.
- Pause and exaggerate listening to the sound.
- Make sure there are no grains left in the pitcher.
- Place the left pitcher in its original place.
- Repeat the exercise with the right pitcher.
- Make sure there aren’t any grains left in the pitchers or on the tray.
- Ask the child if he would like a turn.
- If yes, get up and allow the child to try. If not, invite the child to carry the tray back to the shelf.
Best,
Marnie