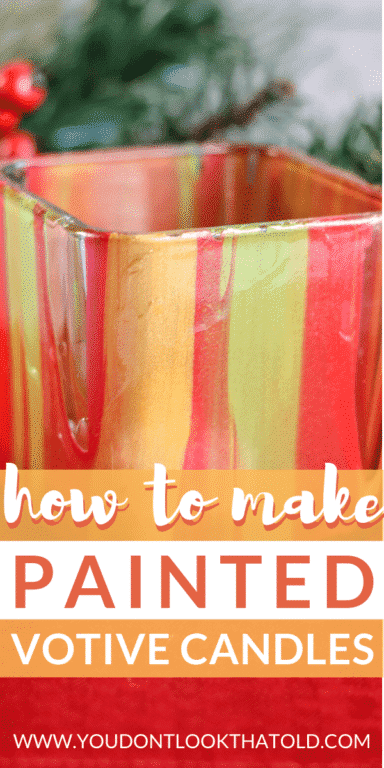
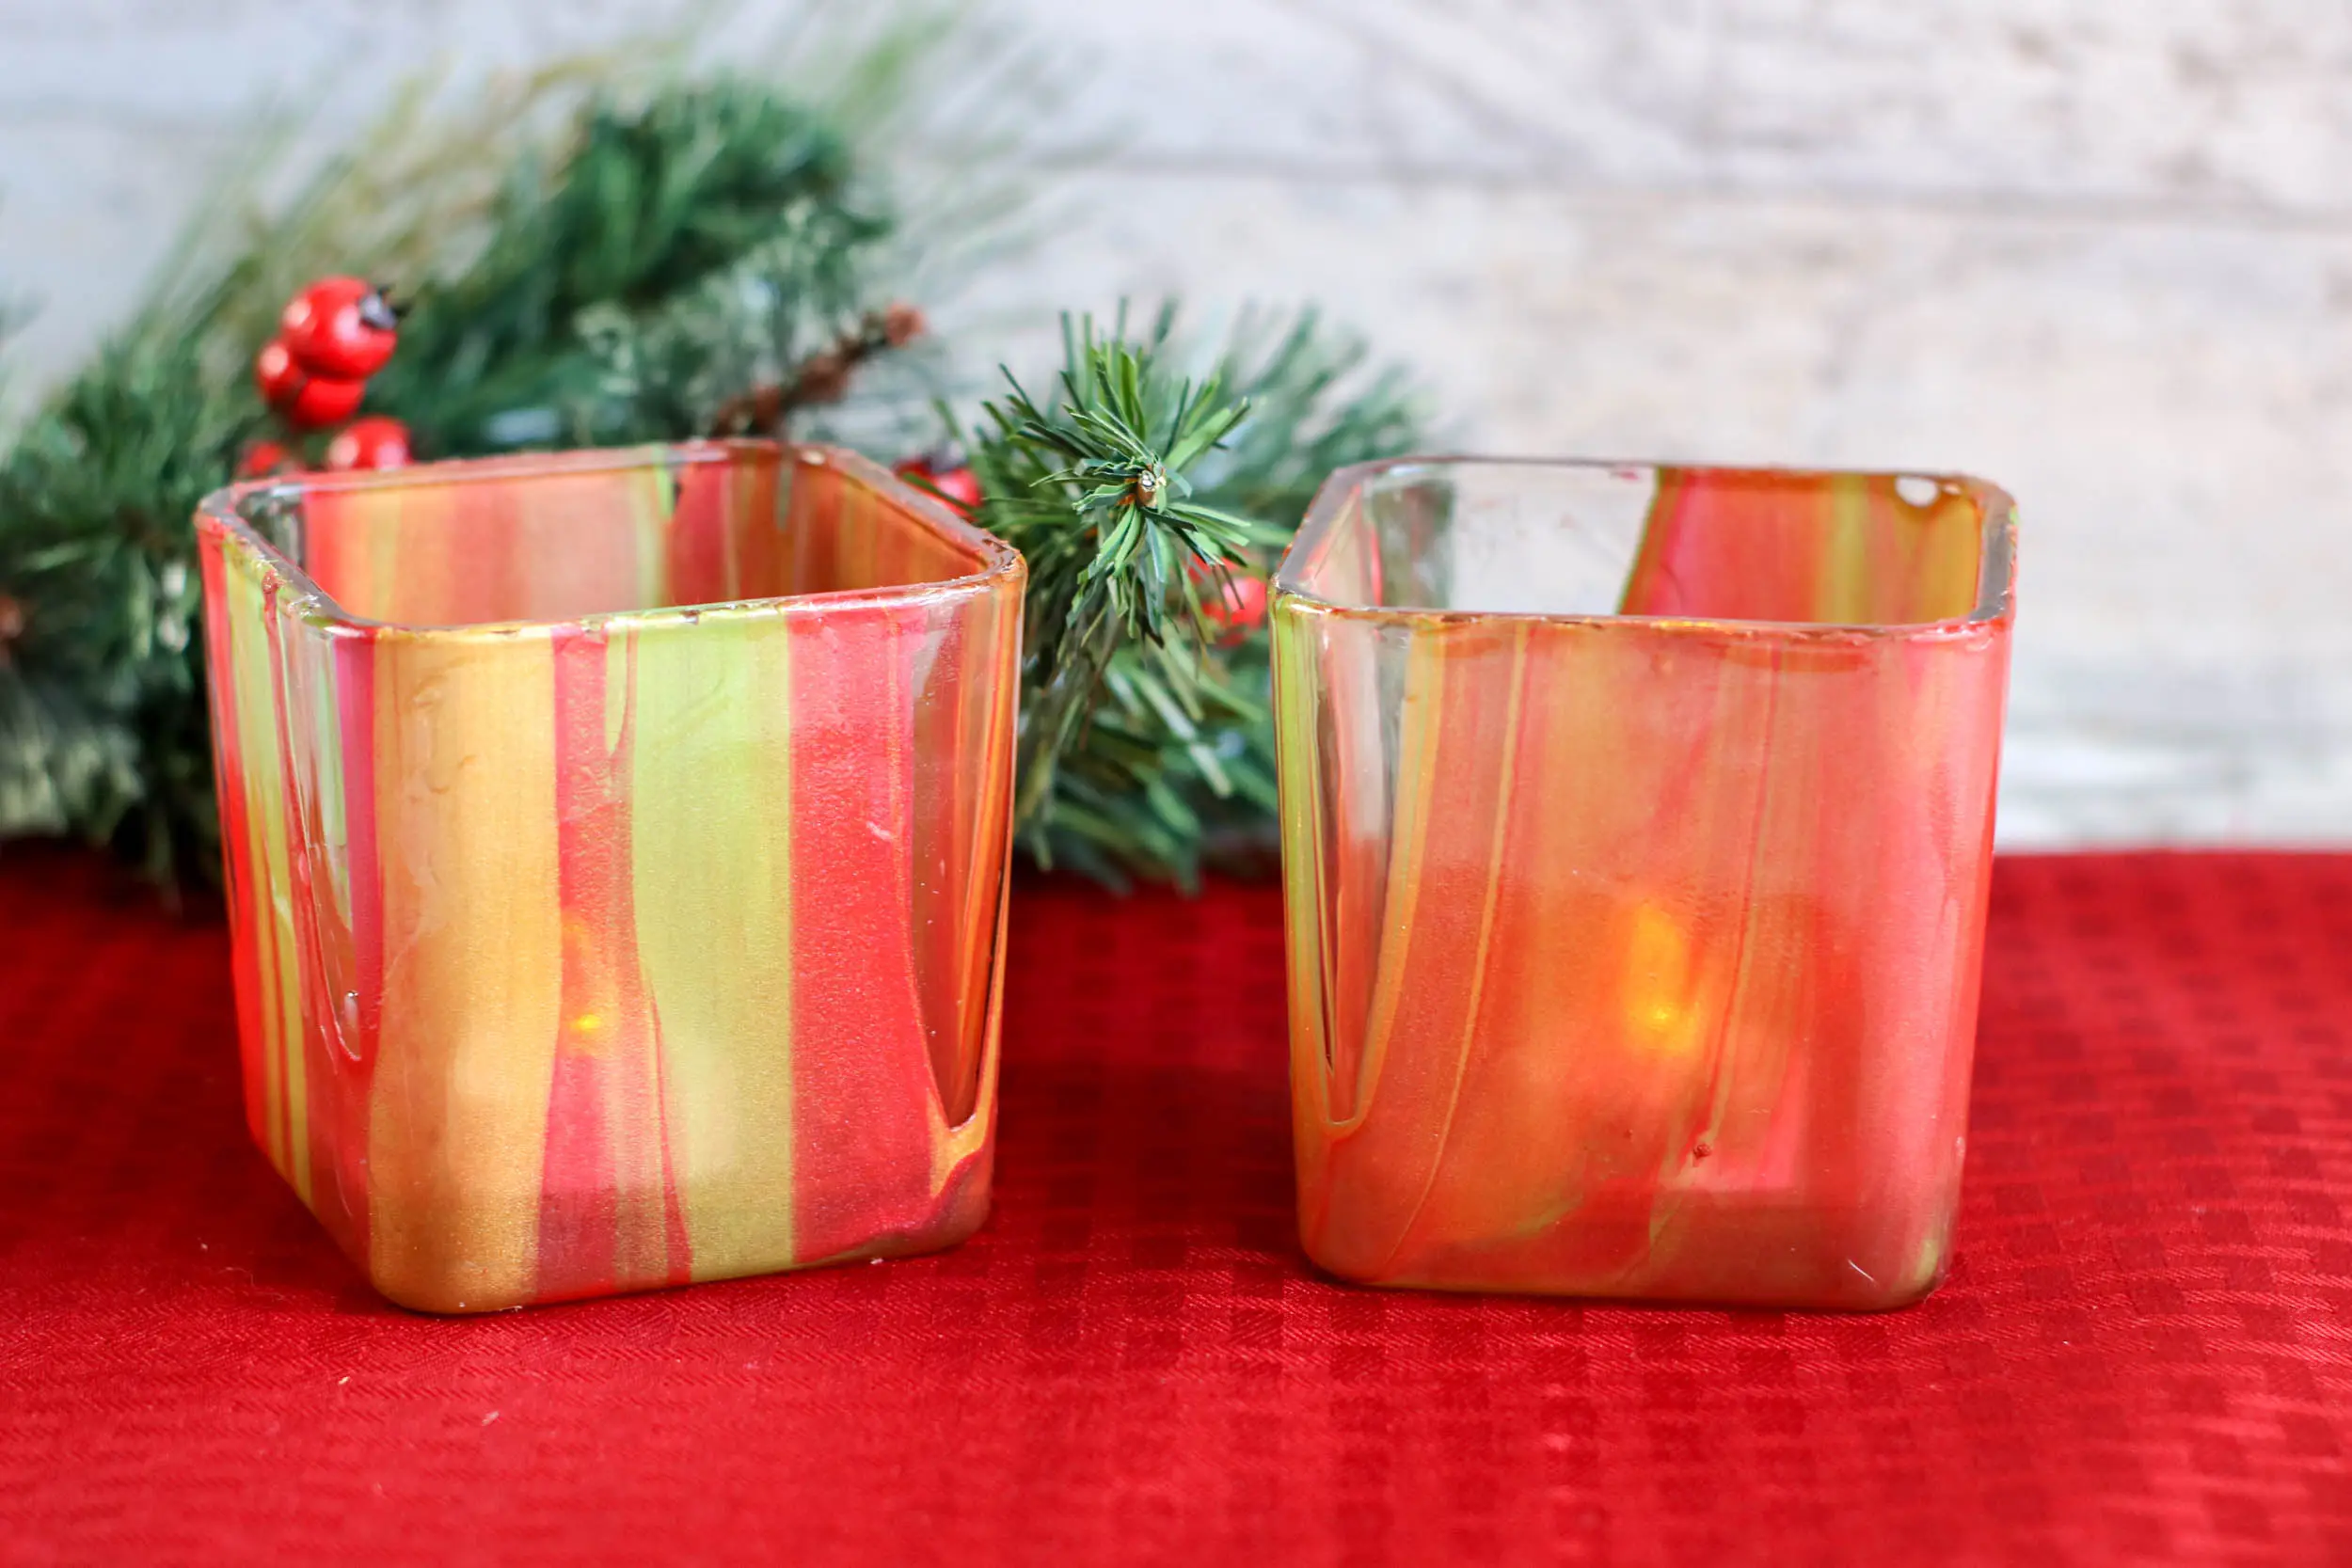
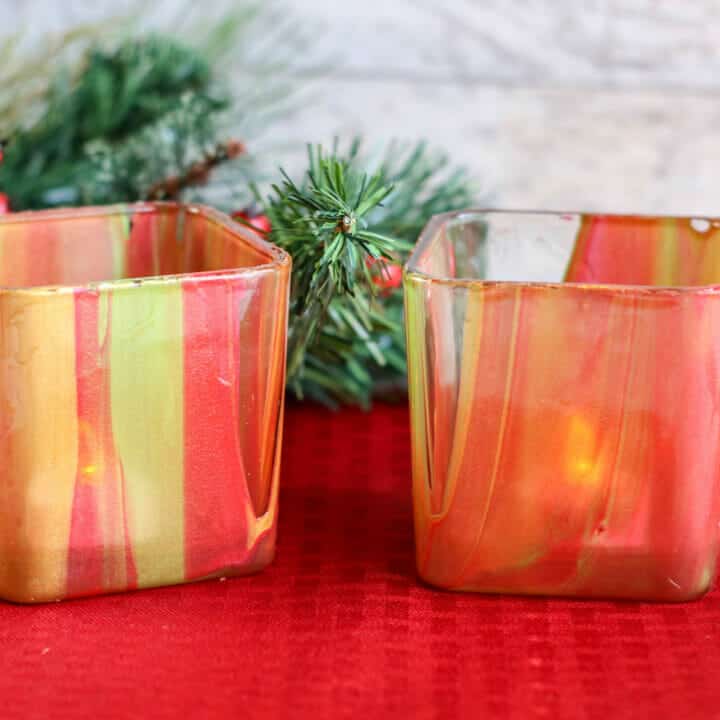
Are you looking for an easy and beautiful holiday gift for teachers or family members? These poured paint votive candles will delight you in how simple this gift is to make and that kids can participate in the candle project!
Painted Votive Candles – A Gift Kids Can Make

What is a votive candle?
A votive candle is a small candle usually white votive candles however often beeswax yellow. It is a prayer candle intended to be burnt as a votive offering in an act of Christian prayer.
A votive candle is different from a tealight candle. The big difference is that a tealight candle needs a specific holder and burns inside a cup. A votive candle can be burnt without a stand or holder. If it uses a holder, the votive candle must fit tightly within that holder.

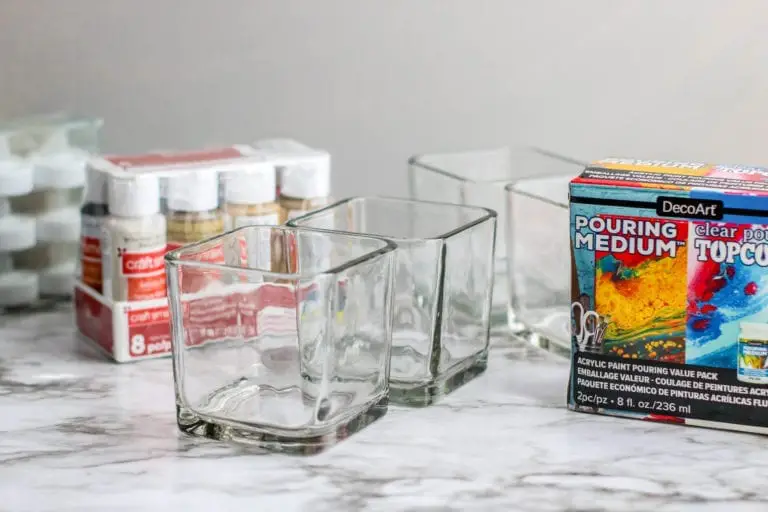
Materials Needed
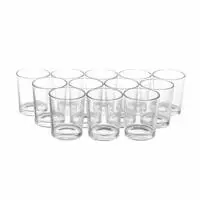
- Glass Votive Candle Holders
- Pouring medium
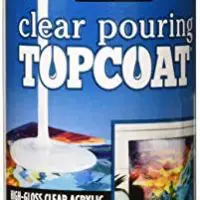
- Clear pouring topcoat
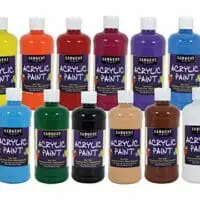
- Acrylic paint
- Bamboo skewer or another straight edge
- Cookie sheet or paint tray (to catch leftover paint)
- Drying rack
- Disposable cups or bowls (for mixing)
Step by Step
- Place drying rack over a cookie sheet or paint tray.
- Clean votive holders and dry completely. Place votive holders upside down on drying rack.
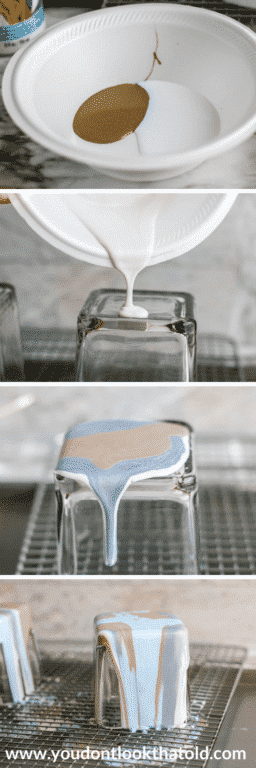
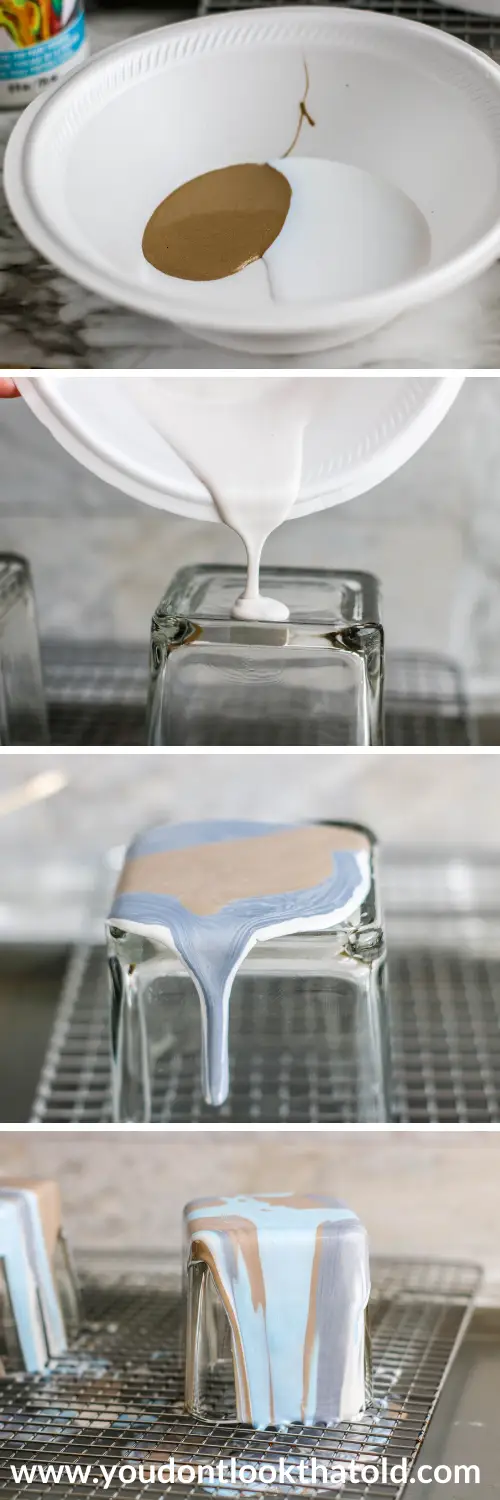
- With one color in each cup or bowl, mix the pouring medium with acrylic paint in a one to one ratio. Stir to blend well.
- Pour paint over votives allowing it to run down the sides. Add additional colors as desired.
- To keep paint from pooling on the bottom of the votive holder, use a straight edge to push the paint down the sides.
- Allow votives to dry completely.
- Once the votives are completely dry, remove from the drying rack and check the edges. Some of the paint may stick to the drying rack. If the paint has accumulated around the edge in an unattractive way, use a sharp, flat edge (like scissors) or an emery board to buff away the remnant paint. For best results, scrape from the painted side to the inside of the votive to keep the paint from peeling.
- Return the votives to the drying rack in the upside-down position. Pour topcoat over the votives allowing it to run down the sides. If the topcoat does not pour evenly, use a flat edge to push the paint from the bottom towards the sides.
- Allow drying completely before using or packaging.

For more gift ideas check out these articles:

Painted Votive Candles
Materials
- Inexpensive glass votive holders
- Pouring medium
- Clear pouring topcoat
- Acrylic paint
- Bamboo skewer or another straight edge
Tools
- Cookie sheet or paint tray (to catch leftover paint)
- Drying rack
- Disposable cups or bowls (for mixing)
Instructions
- Place drying rack over a cookie sheet or paint tray.
- Clean votive holders and dry completely. Place votive holders upside down on drying rack.
- With one color in each cup or bowl, mix the pouring medium with acrylic paint in a one to one ratio. Stir to blend well.
- Pour paint over votives allowing it to run down the sides. Add additional colors as desired.
- To keep paint from pooling on the bottom of the votive holder, use a straight edge to push the paint down the sides.
- Allow votives to dry completely.
- Once the votives are completely dry, remove from the drying rack and check the edges. Some of the paint may stick to the drying rack. If the paint has accumulated around the edge in an unattractive way, use a sharp, flat edge (like scissors) or an emery board to buff away the remnant paint. For best results, scrape from the painted side to the inside of the votive to keep the paint from peeling.
- Return the votives to the drying rack in the upside-down position. Pour topcoat over the votives allowing it to run down the sides. If the topcoat does not pour evenly, use a flat edge to push the paint from the bottom towards the sides.
- Allow drying completely before using or packaging for a gift.
Recommended Products
As an Amazon Associate and member of other affiliate programs, I earn from qualifying purchases.